Chapter 2: Connecting Your OpenSpand
How to CONNECT your OpenSpand TO your ZX
CAUTION: Your OpenSpand takes its power from your ZX. It is very important that there not be any power to your ZX when you connect or disconnect your OpenSpand or you could damage either or both of them.
STEP 1 - Disconnect the power cable to your input your ZX.
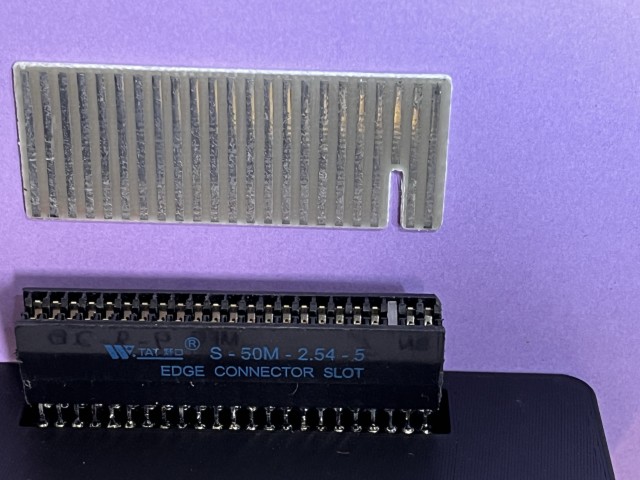
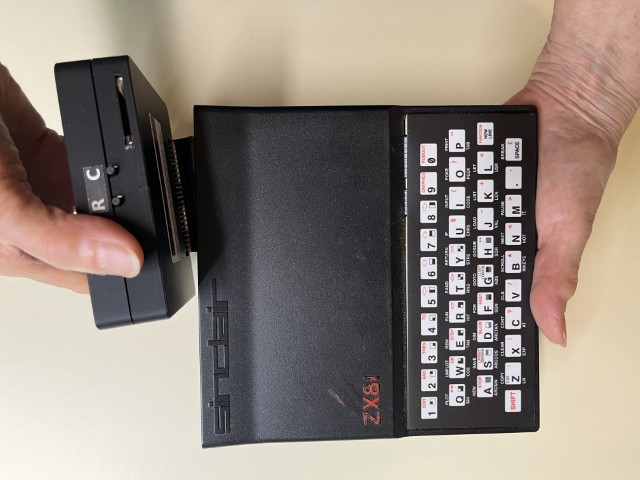
STEP 2 - Review the explanation in Figure about how the OpenSpand and ZX must align, and then connect your OpenSpand as explained in Figure 2.
 |
 |
| Figure 1. A printed circuit board notched like your ZX computer's circuit board and the OpenSpand edge card connector with a matching key in position 3. The notch and the key must be aligned to insert the connector to the PCB. WARNING: If the key ever falls out of the edge card connector, you need to replace it before connecting your Open Spand. |
Figure 2. The best way to attach the OpenSpand is to firmly hold ZX in one hand and then slightly angle the OpenSpand with the face of it closest to the ZX notch and the OpenSpand connector key first. Slightly slide the them so you feel the key slightly go into the notch and then rock the other end so the ZX and OpenSpand are parallel and push them until the OpenSpand is completely on the ZX. |
How to safely remove your OpenSpand from your ZX
CAUTION: Attached or removing remove an OpenSpand from a ZX that has power can destroy either or both of these device.
To remove the OpenSpand first remove the power to your ZX and then separate the OpenSpand from it.
User Guide
- Home
- Users Guide
- Conventions used in this guide
- CHAPTER 1: OpenSpand Compatibility
- CHAPTER 2: Connecting Your OpenSpand
- CHAPTER 3: Choosing Your Display Settings
- CHAPTER 4: Testing Your OpenSpand
- *CHAPTER 5: Storing Programs on SD Cards
- CHAPTER 6 - Removing OpenSpand from its case without damaging it.
- *CHAPTER 7: Using a Joystick
- CHAPTER 7A: OpenSpand Sound Output
- CHAPTER 8: Setting Your Real Time Clock
- Chapter 9 - The OpenSpand Configuration Screen
- Chapter 10 - Installing your Real Time Clock Battery
- * Introduction
- *CHAPTER 5A - The OpenSpand Configuaration Screen
- !! Chapter titles preceded by an asterisk * have not been written yet !!
- INDEX TO DEMO SOFTWARE ROUTINES
- FAQs
- CONTACT